Sunday, November 23, 2014

Victorinox Swiss Army Knife scales 2

   Finally I can show you some custom scales for Victorinox SAKs I made this year. I have finished only two pairs of scales in 2014 so far, but a few more sets are almost ready to go and will be finished next month.
I also put some pictures which I made during titanium and micarta finishing tests. It will certainly be useful in my future projects.


Here are two finished customizations I made this year.

Bantam ORION 
This is a special project made by request. Bantam with titanium 2,5mm stonewashed scales and blue anodized 'stars' creating Orion constellation. The scales have been milled in the inside to reduce weight.
SOLD

Recruit with brown micarta scales


SOLD

Saturday, October 25, 2014

Titanium PRYBARS for Mirek

A couple of weeks ago I got request for another set of prybars - one with stonewash finish and second one anodized. The design we came up with has 1/4'' bit wrench, bottle opener and milled slots for better grip.
For the first time I used my new device in the workshop, a carbidizer that we have built with my brother by combining Dremel engraving tool and DC power supply of our production.We use broken 3mm diameter carbide cutters as a source of tungsten carbide. Can't wait to use it for carbidizing cutting edges on titanium knives.


SOLD

Wednesday, October 22, 2014

Making a Pioneer knife Part 2 - milling grinds and drilling

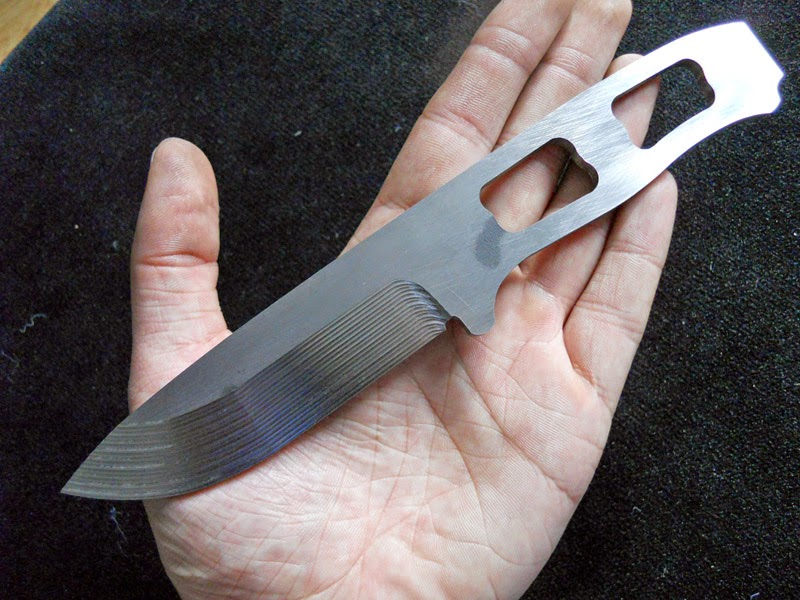
 Hello! It's been a while... I  finally found some time to show you second episode of making the Pioneer knife. Me and my brother have been thinking about making knife grinds with use of milling machine for a long long time. The most important question was: is it possible to make it with a compact milling machine and homemade CNC control. The answer is: Yes! One of the problem was to choose a proper milling cutter. We decided to use a bullnose cutter with tungsten steel round inserts (8mm diameter). We chose it because of its durability, long tool life and the smooth finish that can be made with cutter of such a shape. We have made grinds for four blanks with one set od inserts and it seems that it is possible to grind many, many more knives without changing the inserts. We had to make a special holder for the Pioneer blanks as you can see on the pictures. It helps us to fix the blanks to the table and to position the CNC machine. You can see that a lot of coolant is needed for the milling process. It took us one whole day to make grinds and holes on four blanks of Pioneer knife. Grinds are rought but all of them will be finished with belt grinder in the next episodes. Stay tuned and don't forget to watch the video :)


Saturday, September 20, 2014

Making a Pioneer knife Part 1 - designing and milling blanks

This is a first episode of making my first ever, series of four knives made with use of CNC milling machine. What is more important, knives are made with help of my brother Kamil, who will program the milling monster and work on: 'how to do things'. We have never done such a thing and hope that it will end with a success :) If it will be cool enough, I will make it my first knife model - ready to made on request. That is way, I called it "Pionieer".
The knives are half-finished now. I am showing first step of the story. Step that we made over a month ago.
Of course it started from a designing. I wanted it to be a tough, compact, multi purpose, field knife. Similar to the one I made about 5 years ago LINK. The blade has a lenght of 9,5cm and it is 21cm overal. I decided to use 4mm D2 steel.
From a couple of my sketches I made a CAD drawing. While my brother was programming the machine, I prepared the steel for milling. After a couple of hours we were ready to cut.W made four blanks, one after another. 3mm diameter carbide cutter was used. I made a short video of the milling process.

In the next episode, I will show how we managed to make rough grinds without a grinder... with use of bull nose cutter instead.

Wednesday, September 10, 2014

Titanium PRYBARS for Maciej

About three weekes ago I've got a very interesting request from my customer - Maciej. The order refered to make two almost identical prybars, big enough so it can be used as cubotans. I knew immediately that it will be perfect task for my milling machine. We have decided that 4mm Ti-6Al-4V titanium will do the job... The lenght of the prybars is about 12cm so it will fit perfectly to the hand.


Here are also some pictures from making proces. I got a sketch from Maciej. Then I make a digital version of the drawing and add some modifications to the project, so the prybars can now be also used for M6 hex nuts and as a 1/4'' bit wrench. I used my CNC milling machine to cut it out from a titanium bar. Then it was grinded, hand finished and stonewashed (with use of stonewashing machine that I have built with my brother last weekend). After stonewashing process I have polished one of the prybars with diamont paste and made anodization with a burner, so this is the only difference between them. It was really fun to make them and I  have just started to make some more prybars, but this time smaller, door key sized ones ;)
SOLD

Monday, August 18, 2014

Making clamps for homemade CNC milling machine

   I want to start a new series on the blog. I called it How it's made. I personally love to watch how things are made and I will show you how me and my brother do things in our workshop in short videos and photo stories. We make things not only related to knives and knifemaking. We are making also other thing, like tools, machines, gadgets, jewelry, electrical, metal, wooden stuff, furnitures... There will also be a chance to learn some tips & tricks from that "photo stories".
First episode is about making clamps for our CNC machine with use of CNC plasma cutter made by my brother. The origins of that made from scrap-metal, plasma cutting monster is another story... Today take a look at how we made that very useful simple metal thing. We made the clamps a week ago and since that time we have been using them hundreds of times during our knifemaking projects.  Link Clamps for a milling machine is located in the right column of the blog. Hope you like it!